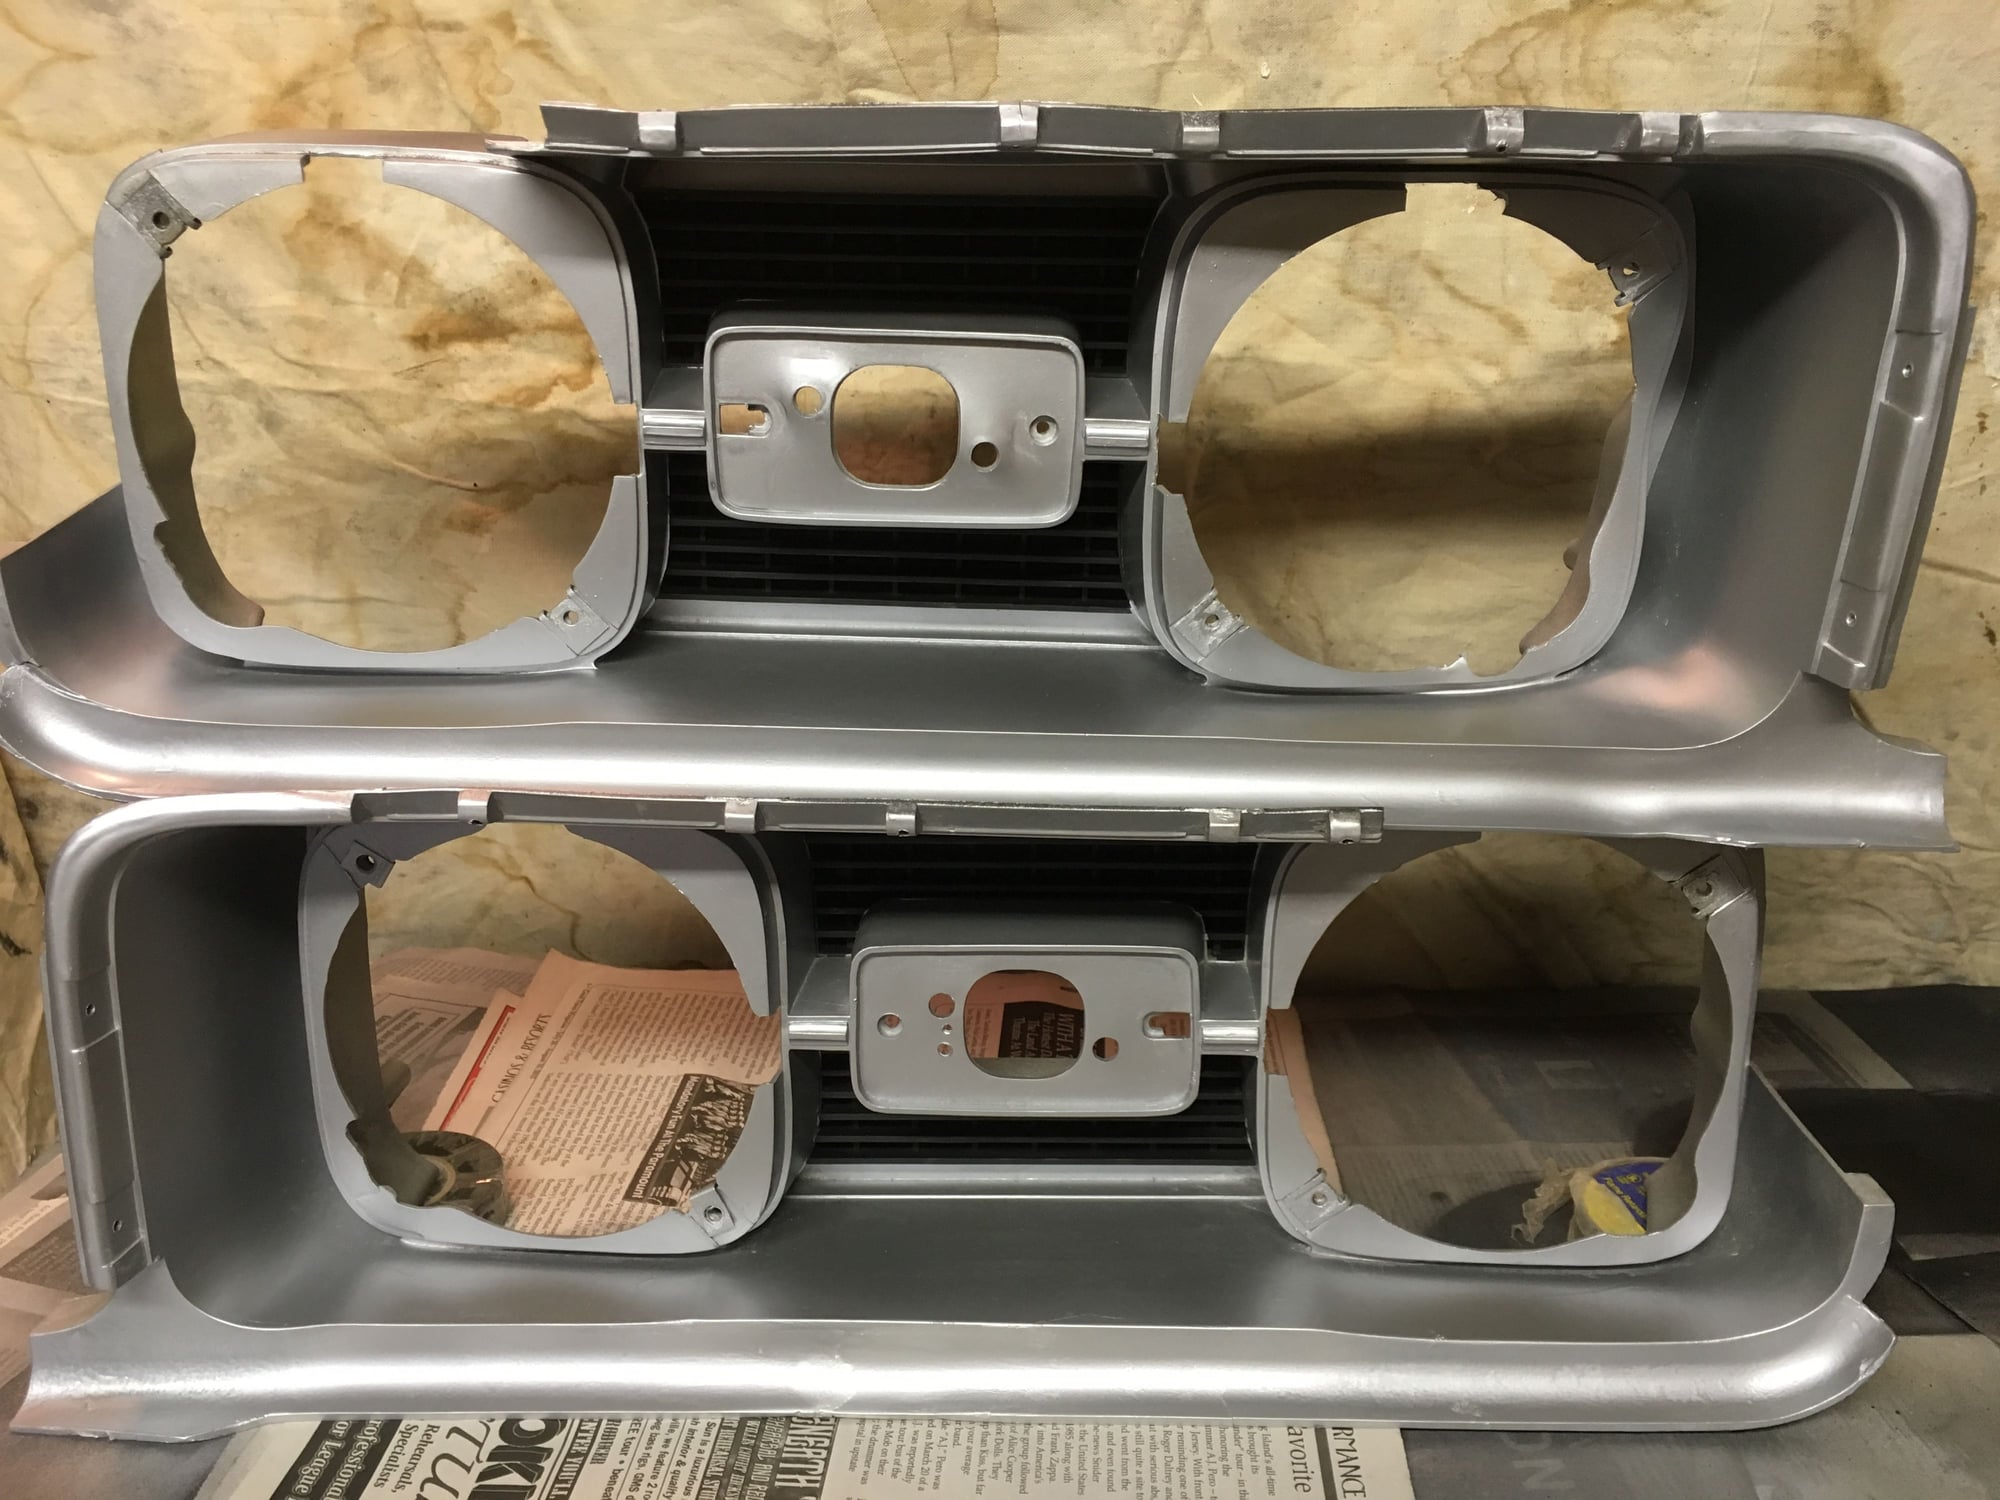
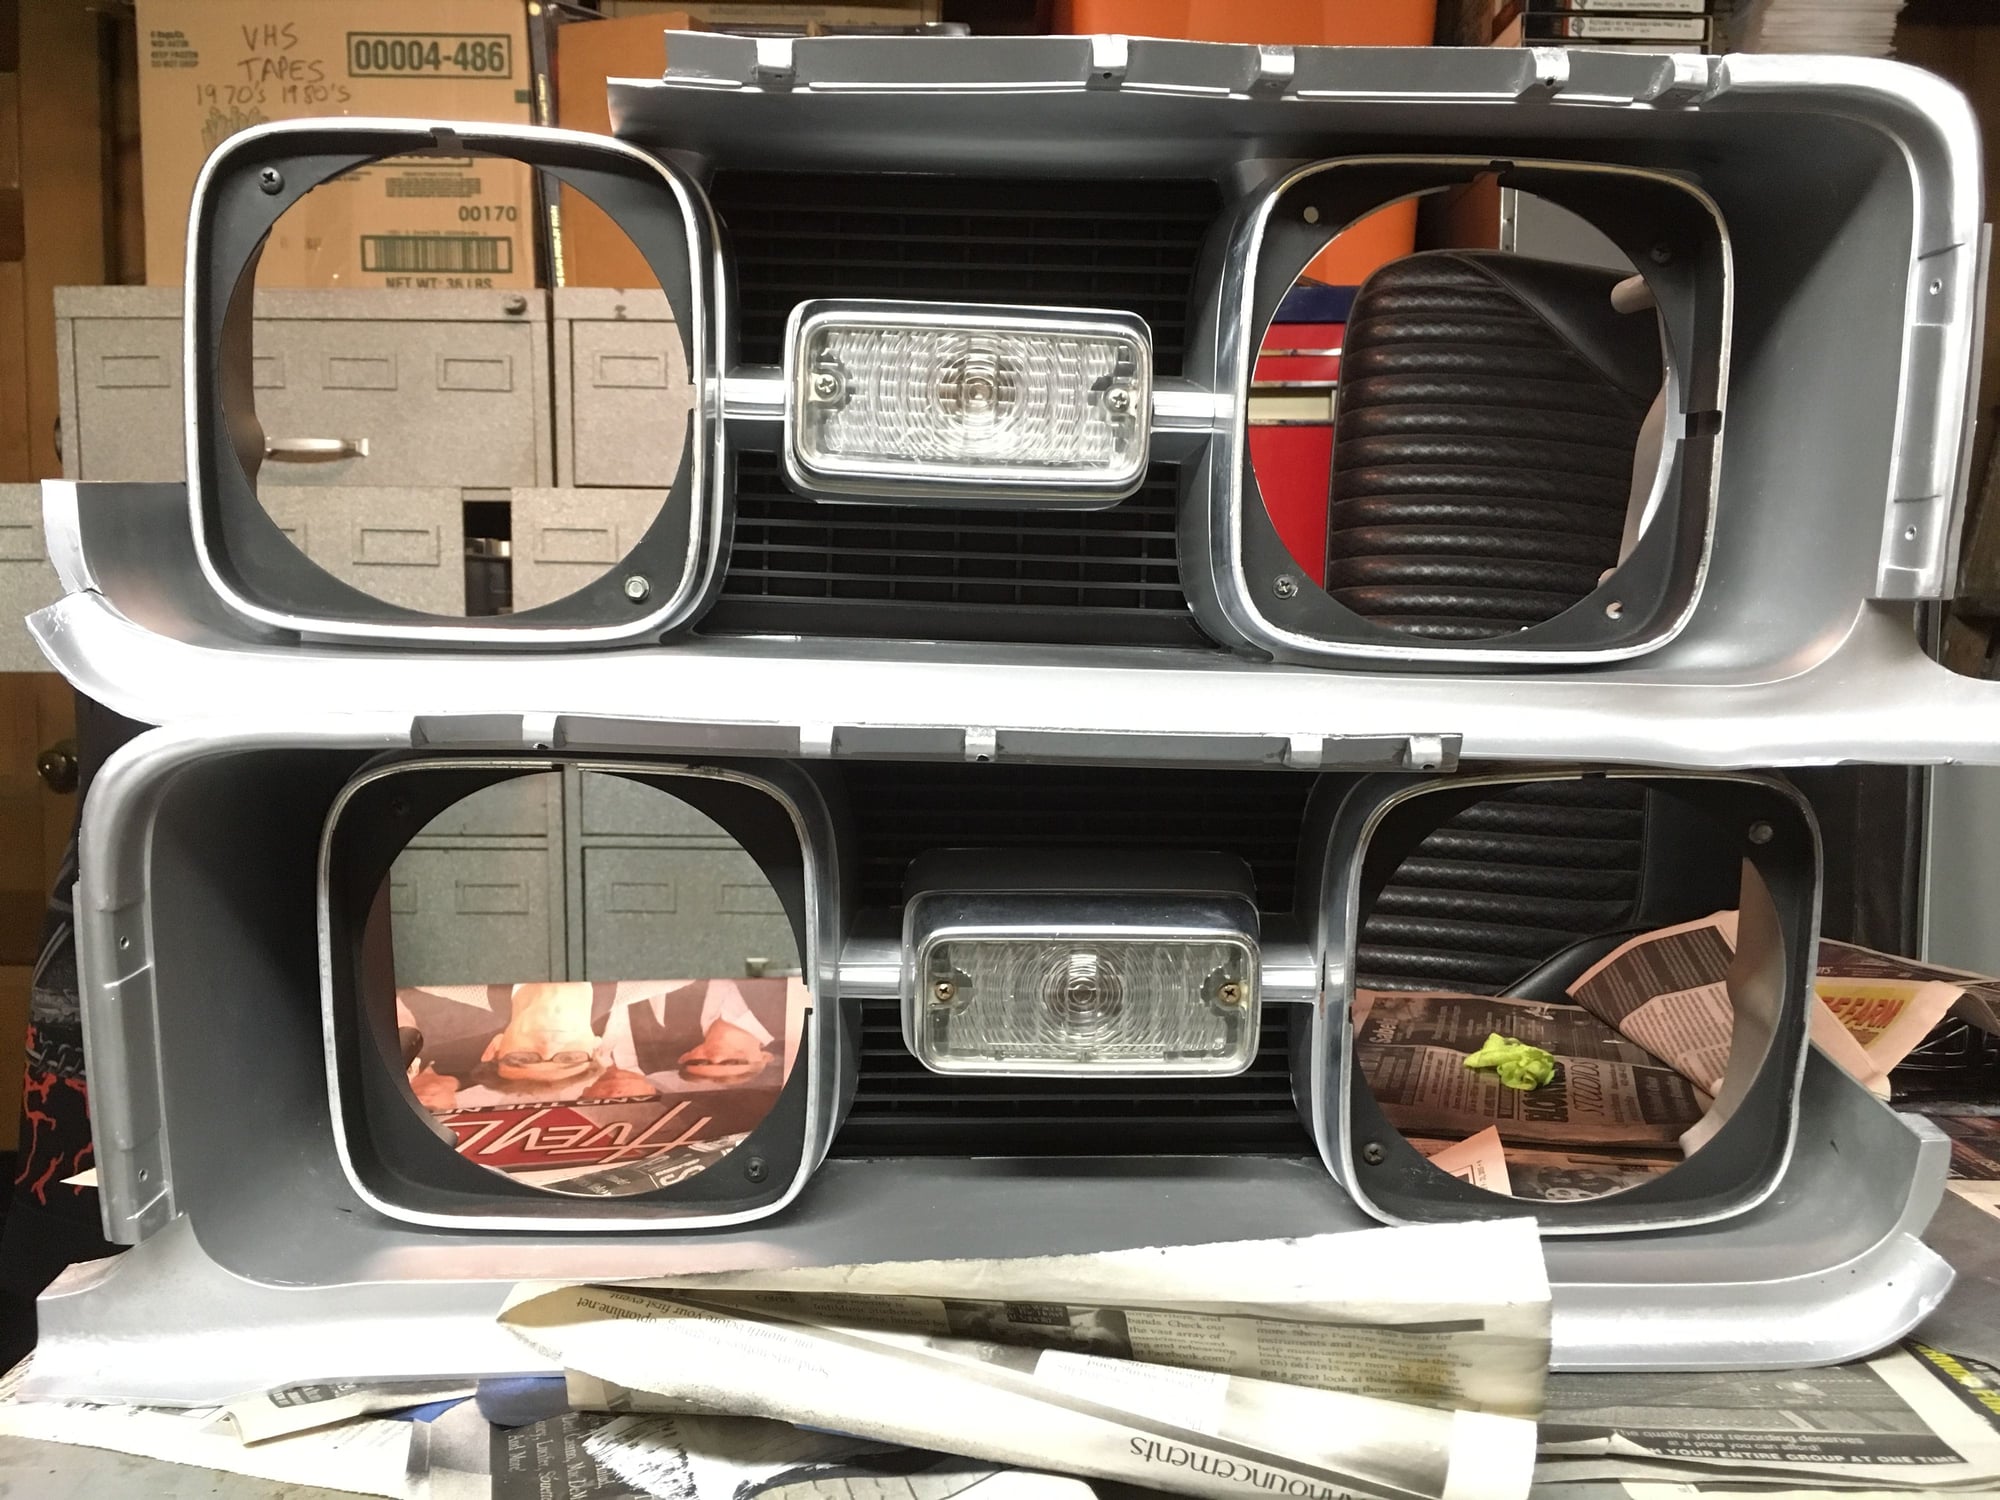
68 olds 442 headlight filler panel

Old September 17th, 2018, 11:54 AM
  #1  
Registered User
Thread Starter
 
muscle car resto's Avatar
 
Join Date: Mar 2015
Posts: 4
68 olds 442 headlight filler panel

Does anyone know the paint code for the 68 olds 442 headlight filler panels?
muscle car resto is offline  
Old September 17th, 2018, 05:11 PM
  #2  
Registered User
 
allyolds68's Avatar
 
Join Date: Jul 2008
Location: Seneca Falls, NY
Posts: 5,258
Originally Posted by muscle car resto
Does anyone know the paint code for the 68 olds 442 headlight filler panels?
given your username I doubt you’re looking for rattle can but the generally accepted color match is Krylon Dull Aluminum. The newer mixture for it is part of the “metallics” line so I’m not sure how accurate it is now.
allyolds68 is offline  
Old September 24th, 2018, 09:18 AM
  #3  
Registered User
Thread Starter
 
muscle car resto's Avatar
 
Join Date: Mar 2015
Posts: 4
Hey thanks if I have to i can always use it to get a color read on so it could still be a great help. Thanks again.
muscle car resto is offline  
Old September 24th, 2018, 09:53 AM
  #4  
CH3NO2 LEARN IT BURN IT
 
droldsmorland's Avatar
 
Join Date: Jul 2010
Location: Land of Taxes
Posts: 4,817
When I reworked mine 30 years ago I used Krylon dull Chrome, not the bright, if memory serves. Probably doesn't exist now. Once they aged and weathered a bit they look factory. Dry spray it in several light coats. Cars been judged several times without incident regarding this color detail. If you find a good way of getting the black into the outer grill area where the 2 bolts are by the metal fill panel please share it.
Another choice is Argent Silver. Get paint from Eastwood.
droldsmorland is offline  
Old September 24th, 2018, 10:58 AM
  #5  
Registered User
 
1968_Post's Avatar
 
Join Date: Dec 2012
Location: Tennessee
Posts: 361
Originally Posted by droldsmorland
When I reworked mine 30 years ago I used Krylon dull Chrome, not the bright, if memory serves. Probably doesn't exist now. Once they aged and weathered a bit they look factory. Dry spray it in several light coats. Cars been judged several times without incident regarding this color detail. If you find a good way of getting the black into the outer grill area where the 2 bolts are by the metal fill panel please share it.
Another choice is Argent Silver. Get paint from Eastwood.
When I refinished mine, I cut a template from chip board, initially at the largest point, and proceeded to trim it down until it fit snugly down inside. Once the template was correct, I removed it and sprayed that part of the panel Krylon semi-flat black. The I inserted the template and sprayed the panel with Krylon dull aluminum. I think their # for it is 1403. I used the template method for all the black areas of the panel, and they came out great.
Attached Images
File Type: jpg
front.jpg (79.7 KB, 18 views)

Last edited by 1968_Post; September 24th, 2018 at 11:02 AM.
1968_Post is offline  
Old September 24th, 2018, 11:29 AM
  #6  
Registered User
 
allyolds68's Avatar
 
Join Date: Jul 2008
Location: Seneca Falls, NY
Posts: 5,258
Originally Posted by 1968_Post
When I refinished mine, I cut a template from chip board, initially at the largest point, and proceeded to trim it down until it fit snugly down inside. Once the template was correct, I removed it and sprayed that part of the panel Krylon semi-flat black. The I inserted the template and sprayed the panel with Krylon dull aluminum. I think their # for it is 1403. I used the template method for all the black areas of the panel, and they came out great.
i did the same but I used cardboard. I still have the templates somewhere
allyolds68 is offline  
Old January 16th, 2019, 01:03 PM
  #7  
Registered User
 
Billyaxe's Avatar
 
Join Date: Aug 2018
Posts: 382
Painted the black first masking off the rest in tape. Then masked the black area and painted the metallic dull aluminum rutoleum brand.
Billyaxe is offline  
Old January 16th, 2019, 02:16 PM
  #8  
Registered User
 
allyolds68's Avatar
 
Join Date: Jul 2008
Location: Seneca Falls, NY
Posts: 5,258
Looks great! Nice to see it done right.
allyolds68 is offline  
Old January 17th, 2019, 07:55 PM
  #9  
CH3NO2 LEARN IT BURN IT
 
droldsmorland's Avatar
 
Join Date: Jul 2010
Location: Land of Taxes
Posts: 4,817
Nice! Now the trick is to paint the black on the outside inserts. Fun Fun.
droldsmorland is offline  
Old January 18th, 2019, 05:47 AM
  #10  
Registered User
 
Billyaxe's Avatar
 
Join Date: Aug 2018
Posts: 382
Did it. I masked off the chrome edges of the bezels with tape. But I curved the tape up at an angle like a cone. Then sprayed it flat black. —Billy
Billyaxe is offline  
Old January 18th, 2019, 10:25 AM
  #11  
CH3NO2 LEARN IT BURN IT
 
droldsmorland's Avatar
 
Join Date: Jul 2010
Location: Land of Taxes
Posts: 4,817
Originally Posted by Billyaxe
Did it. I masked off the chrome edges of the bezels with tape. But I curved the tape up at an angle like a cone. Then sprayed it flat black. —Billy
I'm referring to the plastic buckets, not the headlight bezels.
The outboard indents where the 1/2" fasteners live by the metal fender filler and the opposite inboard indentations are both supposed to be blacked out, the same treatment as seen on the areas above/below the parking lights.
Steve
droldsmorland is offline  
Old January 18th, 2019, 10:55 AM
  #12  
Registered User
 
allyolds68's Avatar
 
Join Date: Jul 2008
Location: Seneca Falls, NY
Posts: 5,258

I thought it was just blocked by the angle of the pic in billyaxe's pics but what droldsmorland means is the recessed areas on the outsides of the housings get painted black too. You can kind of see it on the left side of this pic (you can see where the silver overspray is next to it)

Last edited by allyolds68; January 18th, 2019 at 10:59 AM.
allyolds68 is offline  
Old January 18th, 2019, 03:11 PM
  #13  
Registered User
 
Billyaxe's Avatar
 
Join Date: Aug 2018
Posts: 382
Wow. Thanks I did not realize that. I will paint that then. —Billy
Billyaxe is offline  
Old January 19th, 2019, 04:04 PM
  #14  
CH3NO2 LEARN IT BURN IT
 
droldsmorland's Avatar
 
Join Date: Jul 2010
Location: Land of Taxes
Posts: 4,817
Thanks for the pic Mike. Much.easier to do with the buckets off the car for sure. Steve
droldsmorland is offline  
Old January 20th, 2019, 02:48 PM
  #15  
Registered User
 
Billyaxe's Avatar
 
Join Date: Aug 2018
Posts: 382


Okay I did it. It was really tough to mask off the sides for spraying. Here they are.
Billyaxe is offline  
Related Topics
Thread
Thread Starter
Forum
Replies
Last Post
VAS442
Paint
3
September 3rd, 2016 01:53 PM
servexcell
Parts For Sale
0
September 25th, 2015 05:30 PM
JCMC64
Body & Paint
11
January 8th, 2013 09:21 AM
oldzzy
Paint
10
October 18th, 2011 02:47 PM
sparky44268
General Questions
8
March 15th, 2011 03:34 PM


Thread Tools
Search this Thread
Quick Reply: 68 olds 442 headlight filler panel


All times are GMT -7. The time now is 10:30 PM.