When you click on links to various merchants on this site and make a purchase, this can result in this site earning a commission. Affiliate programs and affiliations include, but are not limited to, the eBay Partner Network.
I noticed that I had a good bit of play in my steering when I drove on roads that weren't perfect flat or even. I jacked up my car on the drivers side and the front wheel had some major left to right play. The passenger side wheel didn't budge so I assumed the front wheel bearings on the drivers side was bad.
This seemed like a good weekend project to learn how to do so I started tackling it. I forgot to buy the inner bearings so I figured I would post my status here to double check a few things.
First, am I suppose to be able to take out the old sleeves that hold the bearings?? I assume the two; one for the inner and outer. My new outer obviously came with one. I tried wedging it out and it seems like it is part of the entire part now.
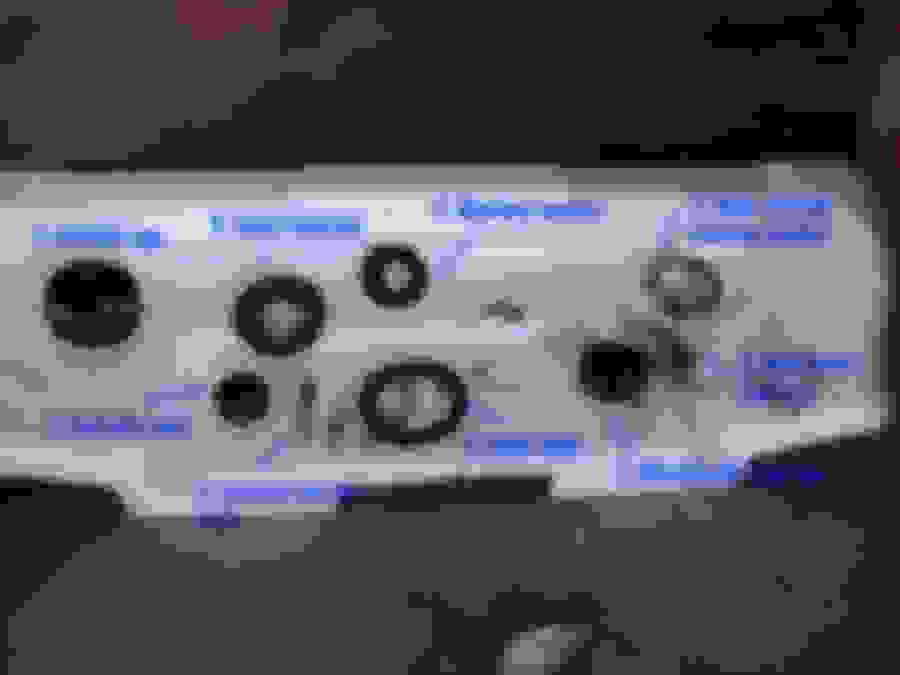
Here are the parts I dismantled.
I made the mistake of not paying that much attention when I was dismantling. Here is what I plan on doing once I get the inner seal and inner bearing and assuming I can take out the old sleeves. I wanted to check in with you guys to see if it looked about right.
1) Grease everything a ton inside
2) Put in new inner sleeve (greased)
3) Put in new inner bearing with the skinnier end of the "cone" inwards (so facing the outside of the router since this is the inner one). Greased of course.
4) Place the new seal over the inner parts.
5) Flip router and start working with the outer stuff
6) Grease
7) Put in outer sleeve (part 9 in picture).
8) Put in new outer bearings greased (part 8 in picture). Again, with the skinnier cone end going in first.
9) screw back on the outer bolt (part 2 in picture).
10) Hopefully not have too much trouble getting the pin in the bolt again (part 3 in picture).
11) Out on outer cap.
12) put back on caliber (which hopefully won't be too hard, it took a decent amount of wiggling to get off).
13) Put on wheel
14) Enjoy.
I don't remember at all where the washer type thing came from (part 5 in picture). Am I missing anything else?
Thanks for any advice. Looking forward to a more control drive soon!
You should use a punch to drive on the back side of the cups/race to remove them! Race are not shown on this diagram. And you should have castle nut no retainer as show!
I suggest you look in your CSM for proper adjustment. Always replace the cup with each new bearing. Also note there is a proper way to grease these. That said, you may have not found your side by side play as that can be caused by other components. Wheel bearing play shows in a in and out movement when shaking the front wheel at the 12 and 6 o-clock positions, as well as on the sides.
First, did you actually determine that the slop in the wheel was due to the bearing and not the ball joints or tie rod end?
Second, did you try to adjust the bearings before tearing them apart?
Front wheel bearings rarely go bad, and when they do, they make a lot of noise. Clean and carefully inspect the bearing rollers and the races still in the hub. Is there evidence of wear or galling?
Naw they look like they could go another 100000 miles easy haha. I would put some anti seize on those studs though.
Pat posted a nice installation picture, Put-r-ther Pat !!
Maybe he will post a picture of a new rotor to compare.
Eric
Last edited by 76olds; January 28th, 2017 at 05:21 PM.
I see what look like ridges on both the inner and outer races? I there are then bearings and races need to be replaced. Look on youtube for videos on how to back wheel bearings by hand.
My dad has a '72 just like yours. When we did the brakes this summer we replaced the rotors (kept the originals because they weren't too bad) and the bearings. The replacement rotors came with the races pre-installed, so it made the whole installation quick and painless. We also used one of those bearing packers. Definitely the right tool for the job to pack the bearings.
I took a lot of pictures when we did the brakes because we replaced a lot of parts. My dad's car still had the static collectors in the dust caps (picture below). The originals were fine and looked nearly new so we put them back in. I don't know what they do or how important they are, but wanted to mention it.
Last edited by Happy Trails; January 28th, 2017 at 06:28 PM.
Reason: Typo
As Pat says use a flat round punch to drive out the bearing races. From the front of the rotor to drive out the rear race, and from the rear to drive out the front. Clean the rotor bearing cavity out well as there may be metal particles from the old bearings/races. I use the old races to help drive in the new races, unless you have the special race drivers. Be shure the races are driven in until they bottom out in the rotor. Then clean the spindle, grease the new bearings and install per the diagram shown above, torque to spec. I just kinda go by feel. Good luck
Steve
Thanks for the advice. I'll try to get the races out today. I know I didn't lose any part or anything rolled away, but I really don't remember seeing an adjustment screw like in the diagram. There is no way that just wasn't there to begin with?
Last edited by Joffroi; January 29th, 2017 at 05:12 AM.
The diagram isn't quite correct for your car. You don't have an adjustment nut and an nut retainer. You have a castle nut instead. (#2 in your diagram).
In permalink #12 picture, there is no adjustment nut, it's a castellated nut used for setting end play. That picture is a good one for showing everything you need as far as parts and tools for doing the wheel bearings!
I got a punch and tried attempt two to get the old races out and I feel like I'm doing nothing. I went back and looked closer at the old bearings and they didn't really seem to have anything wrong with them. I hope these guys really were a problem. Are there any tricks to getting these old races out or do I need to keep hammer at this punch?
Are there any tricks to getting these old races out or do I need to keep hammer at this punch?
Brute force is the only way to get those out. You'll need at least a 2lb sledge. Keep the old races to use as drivers when installing the new ones. You have to be very careful to get the new ones started straight.
Persist with a big hammer and have the hub solidly supported. use the punch all around the race while you are hitting it (Hard ). There is no rocket science here, brute force gets the job done.
Don't ever put a new race on an old cup, it won't last long.
I made the same mistake when trouble shooting the front end noise I was getting on my car . I replaced everything else under the sun so that was the last thing I didn't replace ( wheel bearings ) . One bearing was pretty worn and had a lot of play in it , so I replaced both sides . It turns out it was one of the upper control arm bushings that I tightened incorrectly because the weight of the car was not on it when I torqued it . I loosened up everything , let the cars weight back down , and re-tightened it . That got rid of the noise , but I bought all new bushings anyhow and put them off to the side for now .
I have a big screwdriver that has no handle that I use to bang out the races. I've found it easier to angle it in to get a bite on the race edge inside the hub.
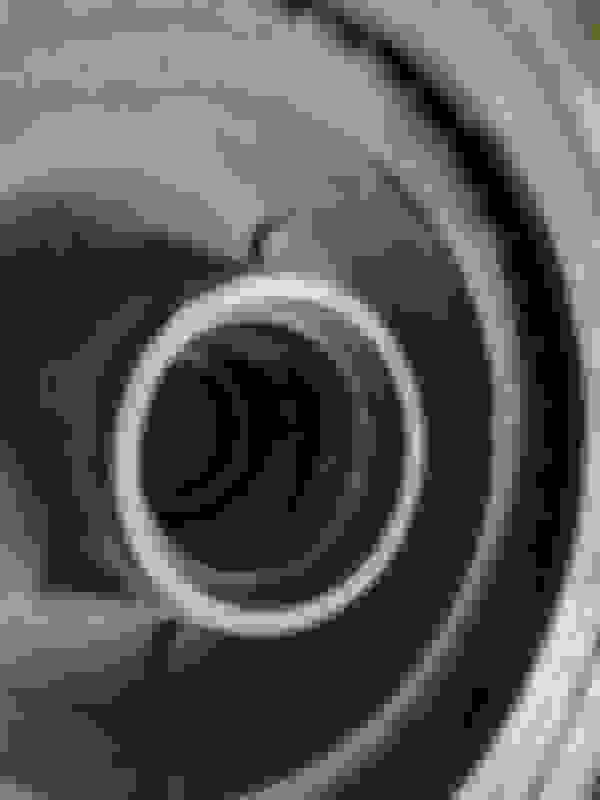
Unfortunately, my weekend garage time ended before I could try another attempt and getting these things out. I'll have to time my next tries it between work and kids sleeping! I had a better picture of my rotor itself that I wanted to post to just double check if I should just replace the entire thing. If so, do new rotors have races already installed?
If so, do new rotors have races already installed?
The rotors my dad bought for his car came with the races pre-installed. I can't really speak much to your rotor condition. They are in worse condition than what my dad had, but he replaced just about everything because brakes are pretty important. He kept the rotors we took off and I suspect he might have them reconditioned at some point since he strives for originality.
I had a better picture of my rotor itself that I wanted to post to just double check if I should just replace the entire thing.
If so, do new rotors have races already installed?
Yes, new rotors should come with races installed. But check them.
That being said, it looks like your pads are not making full contact with your rotors.
How do your pads look? If they're worn, that could be part of the problem.
However, in my experience (which may or may not match others' experience), when a rotor is not evenly contacted like that, the culprit is often the calipers.
Since they're darned cheap, I'd replace them at this point.
Then you'll have new calipers, pads, rotors, and bearings (and cotter pin - don't reuse cotter pins).
There is nothing wrong with having the rotors cut, if they're within spec., but it may well cost the same thing, or less, to replace them.
And, just so you know, the rotors should have little half-circle "holidays" in two or three places inside, at the edge of the lip where the bearings bottom out - you put your punch in there to get a good square shot at the bottom of the race to get the race out.
Also, when reinstalling, leave the new races in the freezer for an hour, and warm the rotors up a bit with a propane torch (not so hot that you can't touch them, as the job will become awkward if you do), then the races should more or less just drop in, and all you need to do is give them a nice tap all around to be sure they're seated.
When reassembling, do read the instructions in the CSM and follow them.
Just an update:
Pads look great. I went ahead and ordered new rotors because they were pretty cheap on Amazon with free shipping. They did come with races in them. I made sure they were there, greased up the new bearings and was ready to go. I got the rotor put together and mounted. I shook it around and didnt see any place so I was excited.
It then took me an embarrassingly long time to get my brake caliper back on. We'll just leave it at that.
Finally got it all put together and was excited. I hit the road and...... same symptoms. On my "test" road that is fairly worn with noticeable divots where car's wheels go in the lanes, my car felt like it wanted to wobble around. On more even roads, no issue. So it looks like I'm back to where I started. I got back home, jacked up the car.... the same wobble. I spent a little bit of time and couldn't really tell where it was coming from. Got late, will tackle another day.
Okay, so tell us exactly what the wobble is like - Where, exactly, is there movement that there shouldn't be? What direction? Up-and-down, back-to-front, side-to-side? Is there any play anywhere in the steering, from the steering wheel to the wheels? Have you specifically checked for play in the upper ball joints, lower ball joints, upper coltrol arm bushings, lower control arm bushings, and all tir rod ends and linkage?
This youtube video shows my "wheel movement". Its mostly left to right. When I had just the rotor on, I made sure I couldn't move just that in different directions. After my test drive and I jacked the car up, I spent a little time trying to see if I can exactly tell what was actually moving when I tried to move the wheel, but it was dark and I was frustrated and just called it an evening. https://www.youtube.com/watch?v=PnSBQA7ECDs.
There is some play in the steering wheel, but nothing that I would consider too out of the ordinary compared to my other Oldsmobiles I've owned. This one may have more, but most of the time I only noticed it on roads I mentioned, where they are a little more worn and I get the impression the car is trying to go a little in its own direction.
Looks like I need to do more digging. I don't know much about front end work but going to learn. I need to just make a list of things to check and start going down it when I get the time.
You definitely have too much movement 12:00-6:00, and you seem to have WAY too much movement 9:00-3:00, so long as that's actual free play, and not movement of the whole steering system.
Lower ball joints and control arm bushings may or may not be bad, but wouldn't show up like this, as they have the weight of the car on them and it takes more force than that to move them.
Very loose or missing upper control arm bushings can look a bit like this, especially the front-back movement, and a bad upper ball joint could give you the up-down play.
The front-back movement could also be some very bad tie rod ends or centerlink.
Did you tighten the wheel bearing nut as specified? Is any of this play in the wheel bearings / hub itself?
Have you checked each tie rod end for play, one at a time? (I like to grab them in my hand as the linkage is moved, so that I can feel relative movement that I wouldn't be able to see).
First grab the tire at the very top, 12 o'clock and bottom, 6 o'clock, and gently try and tilt it up and down. If you have play there then your wheel bearing preload is not set right.
Next, with the front tire about 2-3 inches off the ground. Slide a long pry bar under each tire and gently lift while watching the upper and lower ball joints where they meet the steering knuckle. If there is play there then replace the ball joints.
Next lower the car to the ground and have a helper gently turn the steering wheel from left to right just to the point where the tires start to move. Look at each joint, inner/outer tie rod on both sides, centerlink ends, idler arm pivot/end, for play. These components if worn will have play side to side or up and down. Replace any component that has play.
Next inspect the upper and lower control arm bushings. The uppers if worn may be missing the rubber or the rubber is cracked and chunky looking. The lowers also may be missing rubber, the rubber looks chunky, or the bolt is not centered in the bushing.
Post pictures or videos of anything you have questions about. Most of this is self explanatory as you perform these tests.
Next, with the front tire about 2-3 inches off the ground. Slide a long pry bar under each tire and gently lift while watching the upper and lower ball joints where they meet the steering knuckle. If there is play there then replace the ball joints.
Notes:
By "long bar," he means something about 6' long, like a 1" iron bar, or a piece of 1�" or 1�" pipe.
This is a two man job: One stands a few feet to the side, wedges the bar between the floor and the tire and slowly lifts up and down while the other lies on the floor and watches the lower ball joint.
First, unless you have the spring compressed by jacking under the control arm, you will not be able to see any movement in either the ball joints or the bushings. There will be too much preload on them. This is a wheel bearing problem. It is not adjusted properly. That is the only flaw that can allow this much movement in both the 3:00-9:00 and the 12:00-6:00 directions, especially with that little force on the tire.
Thanks for adding where to place the jack, an assumption on my part that he will place the jack under the lower control arm for checking ball joints. I agree that he probably needs to recheck the wheel bearings as is why its first on the list of things to check.
It is not adjusted properly. That is the only flaw that can allow this much movement in both the 3:00-9:00 and the 12:00-6:00 directions, especially with that little force on the tire.
That was my first question, five posts ago.
No answer yet.
I have been able to elicit a decent amount of movement while jacked up, when both upper control arm bushings were completely gone, though.
I have been able to elicit a decent amount of movement while jacked up, when both upper control arm bushings were completely gone, though.
- Eric
Are you alluding to the size of your forearms, Popeye?
I guess I'd be impressed by that. On my 67 D88, the rubber in the upper control arm bushings was completely gone, but with the suspension at full droop, the springs still pulled the UCAs down hard enough to compress the upper bump stops and immobilize the suspension. My pencil arms certainly couldn't move the tires until I put the jack under the LCAs and compressed the springs.
Did you tighten the wheel bearing nut as specified? Is any of this play in the wheel bearings / hub itself?
- Eric
I believe so. I hand tightened it for the most part and could rotate the rotor about a half - 1 full rotation when I spun it. When I had the rotor completely assembled, I did try to shake it at 12:00 & 6 and also 9:00 and 3:00 and had no movement. However, after my failed drive test and re-jacking off the car, when I moved the tire I could have sworn the rotor moved with it.
As much as I wanted to continue looking into this, my garage doesn't have the best lighting, I was discouraged from my results, and with sick kids, an impending long night of that ahead of me, I went ahead and called it a day.
I appreciate all the advice I get from the members here, no matter how maybe embarrassingly simple my questions may be. As many know, I'm a tech guy that enjoys the escape from computers and working on the car I worked hard to get and consider myself lucky to find. I obviously have a lot to learn and with the recent post... a lot to check. I'll keep you posted when I can find another chunk of time.
The bright side is I feel like I can put a new rotor and bearings on my other front wheel in no time!
As mentioned more then once, if you have a CSM read it and use it. If you don't, you should. It will save you numerous headaches. It spells out how to adjust wheel bearings, will show you how your steering works and teach you the names of each part.
 January 28th, 2017, 01:16 PM


 ). There is no rocket science here, brute force gets the job done.