When you click on links to various merchants on this site and make a purchase, this can result in this site earning a commission. Affiliate programs and affiliations include, but are not limited to, the eBay Partner Network.
Started the install on the T56. I'm going with a Hyd. Clutch setup I used Chevelle clutch pedal assembly. The trans bolts right up when using a BOP Quicktime bell housing, and a BCA 7109 piolot bearing. I had the crankshaft drilled and bearing installed when the engine was rebuilt. My floor was butchered up from years ago when when some one put a super shifter in the car. With the trans bolted up,the crossmember cannot be installed due to the fact that when you try to set it in the frame in the diagonal position to slide it back square the front of the crossmember hits the back of the trans. I cut and welded a flange to one side of the crossmember to make it a two piece crossmember. Got it bolted up to trans the frame may need to be drilled for holes to line up. Just waiting on the headers from ARH to see how they line up to the crossmember exaust humps. If the headers fit nice I will continue to work with the original crossmember.I'll get some pictures as soon as I install the headers.
Just an update on the T56 installation. I will post some pictures soon I haven't had much time to work on it, but the trans tunnel is almost complete. What I have experienced, is that if your going to install the trans,and retain the factory console, you have a couple choices to make. One is to make major mods to the console, or design the tunnel around the console is what I did. The 70 -72 consoles are very narrow in the middle, so in order to get it to fit that section of the tunnel needs to be narrow. What I did was make the rear section of the tunnel removable, being that the rear section is narrow for the console,it would make it very difficult to remove the trans. I still may have to trim the console base a little, It all depends on how it fits with the carpet in place. The easiest install would be a non console install,non four speed trans tunnel.There are a few other things to deal with I'm far from done,I figured I throw a few things out there as I go along. If anyone has a few pointers or questions feel free.
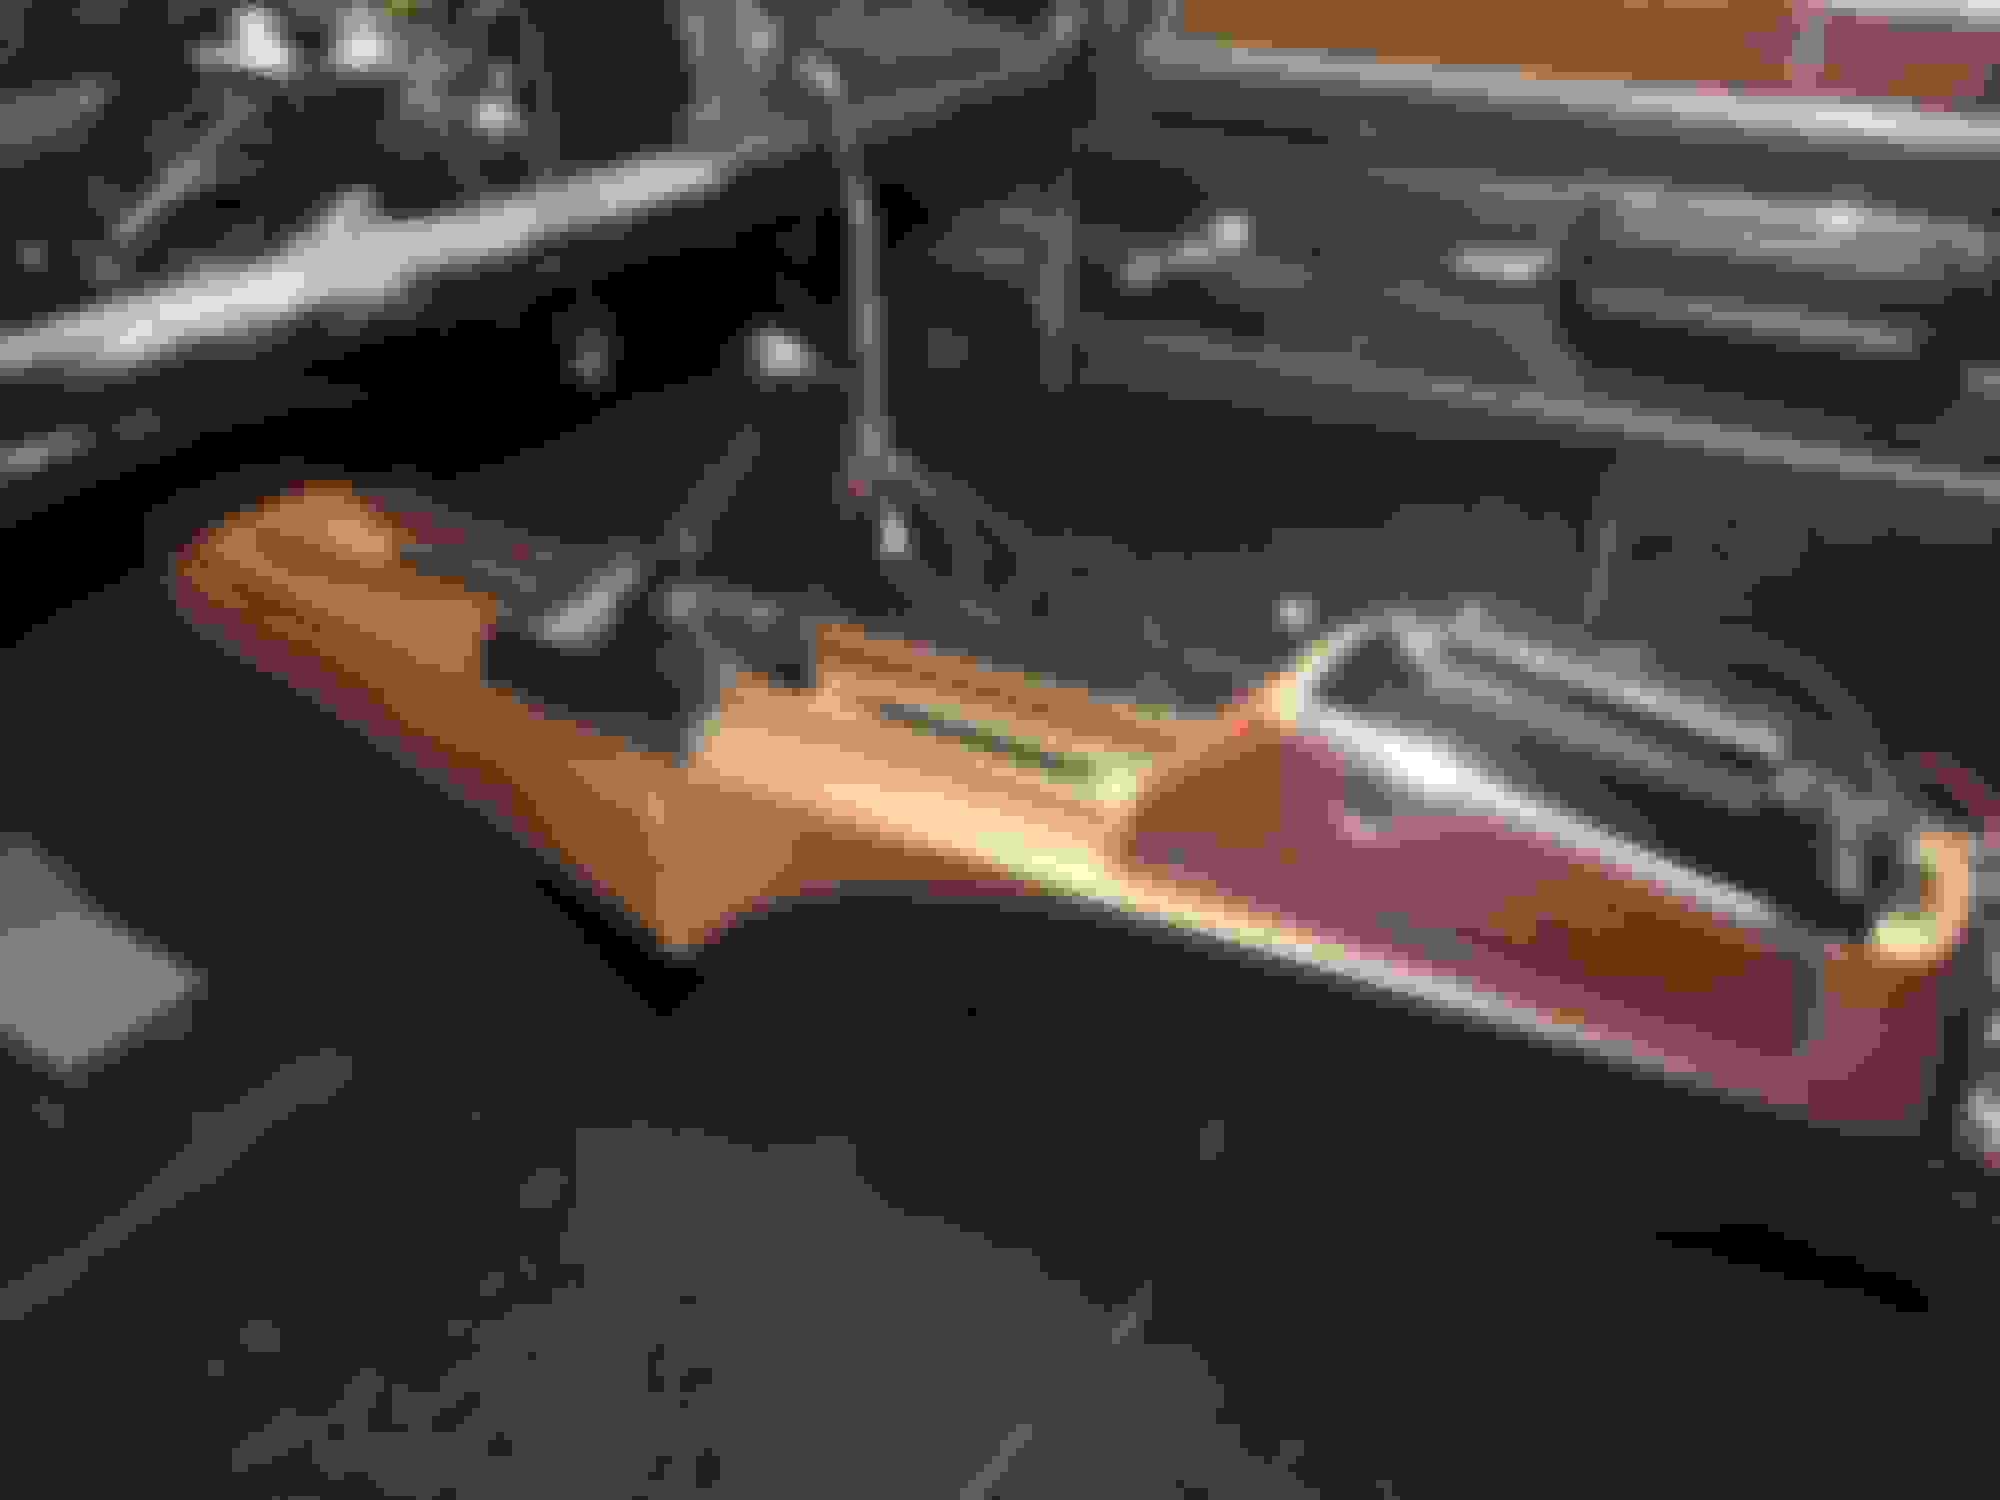
Here are some pics of the clutch setup for hydraulic clutch from American Powertrain. i started out with a Chevelle clutch and brake pedal assembly. (i installed that setup back in the 80's when my Oldsmobile setup broke, so I just worked with that). I had to trial and error several times to get where it is now, if i went by the direction that came with the setup I would of had 4.1 ratio using the factory clutch pedal rod drive hole, which resulted in a very short stroke, and didn't have the factory feel. What i did was add 3/4 of an inch to the clutch pedal master cylinder drive rod lever which gave me approx. 5.5 ratio, in turn gave me a nice full stroke close to a factory feel, one of the pics shows that piece I welded in-between, you will have to make an access hole in the hanger bracket so the extended clutch pedal lever has clearance. One thing that must be done is to have adjustable pedal stops, up top I have a temp upper stop, I will be making a more permanent stop, my bottom stop is a hood bumper which is adjustable, so the pedal just bumps into it and its adjustable. It's important not to over stroke the master cylinder, so with the upper and lower stops you can adjust where the pedal is in the rested position and final position. I have a few more things I did, but I will get more pictures so it easy to understand. I haven't had the system under pressure yet with the throw out bearing, but I'm getting full stroke so I don't think it should be an issue.
Last edited by geoff442; May 15th, 2017 at 03:18 AM.
Reason: add more info
Geoff,
Are you done with this T56 project? I'm in the middle of the same thing on my '69 convertible 442. I would appreciate any more photos you might have.... especially any of the finished tunnel prior to installing carpet, etc.
Thanks,
-Martin
[QUOTE=MartinH;1183868]Geoff,
Are you done with this T56 project? I'm in the middle of the same thing on my '69 convertible 442. I would appreciate any more photos you might have.... especially any of the finished tunnel prior to installing carpet, etc.
Thanks,
-Martin[/QUOTE.
I�m not completely done but it�s coming out very good, PM me and I can give you my number and we can talk about it.
Sorry for the slow update but this has been a long term project. I kind of took a different approach to the project and built the trans tunnel around the console as well as the trans. I made a two piece tunnel with the rear section removable to facilitate the removal, and installation of the trans. The main drawback is that the passenger seat will have to be removed to remove the trans which is really not that bad. With the large opening it make getting the tran out very easy. The rear section is bolted in with a bolts around the perimeter of the the removable section. The floor around the perimeter has been reinforced, so even with the top cover off it is very sturdy. The main challenge was the way the console is very narrow in the center portion, so I had to make that portion of the tunnel narrow as well. Being I am running Eletric fans I did lower the engine approximately 1/2 inch to help achieve proper pinion angle, which also helped with tunnel clearance. I could affirm the console is approx 1/2 inch rearward to the original mounting location and slightly higher in the front. The console has not been modified which was one of the reasons I went to this extreme, call me crazy but it was actually fun to do. Right now the car is completely disassembled and in the body shop I’m going to document photos of the trans install when I put it back together next month but hears the story behind it. I did have a problem with the original crossmember installation it would not fit back into the chassis due to the large rear section of the trans, it would not fit diagonally, I did temporarily cut and flange the crossmember to get it in to check angles, and tunnel clearance. Hurst does make a three piece crossmember that fits perfectly, it was the only part of the job that didn’t need modifications in the frame location it bolted to existing hole that were predrilled from the factory. Please any questions or suggestions are welcome when I get the car back I will be doing the final assembly so there may be a few tweaks left.
Last edited by geoff442; April 17th, 2020 at 05:10 PM.
Reason: Typo
Looks great! i started to alter my tunnel for a T56 and also had to raise the console height due to the tunnel fab. But now that it's raised up a bit more the arm rest is more functional and comfortable. What carpet did you use to cover? did you but a stock 4 speed carpet and then do some alterations or did the stock carpet cover without alterations? thanks!
I used the original carpet for a console car. I did have to cut it just in front of the console and make it three pieces, with the console installed it’s almost undetectable where it’s cut in the front. It’s does take some manipulation to get it to fit just right. Making it a three piece carpet only made it easier to remove my tunnel cover if need be.
 October 23rd, 2014, 02:26 PM