1956 Oldsmobile Rocket Engine Rebuild
 February 1st, 2016, 10:05 AM
#81
Registered User
Thread Starter
Join Date: Jun 2013
Location: STLMO
Posts: 124
Ignachuck, here is that connector off mine.
compressor%20ac%20olds%2056_zpsa0snsf4m.jpg
compressor%20Olds%2056_zpsig5ftqu0.jpg
20160127_191411_zps257c0ut9.jpg
compressor%20connector%20olds%2056%20x_zps4nafrfic.jpg

compressor%20ac%20olds%2056_zpsa0snsf4m.jpg
compressor%20Olds%2056_zpsig5ftqu0.jpg
20160127_191411_zps257c0ut9.jpg
compressor%20connector%20olds%2056%20x_zps4nafrfic.jpg

 February 2nd, 2016, 08:25 AM
#82
Frank Ignachuck
Join Date: Jan 2012
Location: Maynard, Massachusetts
Posts: 1,285
That's the one. Thanks Jeff.
While on the subject of A/C, have you explored the interior ductwork? There is a plastic manifold that fits behind the controls. There are lots of pictures of it in the service manual. Almost all have disintegrated through the years and are long gone, including mine. I've figured out how to fabricate a new one. Let me know when you get to it and I'll take some pictures for you.
Frank
 February 8th, 2016, 10:59 AM
#86
Registered User
Thread Starter
Join Date: Jun 2013
Location: STLMO
Posts: 124
I was afraid you were going to show me that after I looked in the manual. I have a hose that runs the length of the dash but nothing that goes into a manifold like that that I can remember. I'll have to look again.
February 9th, 2016, 03:10 PM
#87
Frank Ignachuck
Join Date: Jan 2012
Location: Maynard, Massachusetts
Posts: 1,285
Background: I'm on the fourth year of a two year project to bring my '56 back to life. Last summer I was plumbing the heater and AC hoses under the dash (all gone) and discovered the AC manifold issue. Looking around the garage I spotted my Sears wet dry vac.
Fast forward: 2- Craftsman 2 1/2" car nozzles $8.99. each Part number 16978. See attached.
I haven't cut the nozzles to length yet, but I have done a dry fit and they fit perfectly. I have to cut a rectangular hole in them for the center discharge, but it seems to line up.
Red Green would be very proud!!
Last edited by ignachuck; February 9th, 2016 at 03:11 PM. Reason: spelling
February 12th, 2016, 02:56 PM
#89
Registered User
Thread Starter
Join Date: Jun 2013
Location: STLMO
Posts: 124
Thanks bobus8!
Ignachuck, I definitely don't have that manifold under my dash. In fact, I don't have all the ducting that goes to it either. Good idea though! Thanks for sharing.
I'm hoping my AC works when I get it back together. Still not sure how R134 will do in the system.
Ignachuck, I definitely don't have that manifold under my dash. In fact, I don't have all the ducting that goes to it either. Good idea though! Thanks for sharing.
I'm hoping my AC works when I get it back together. Still not sure how R134 will do in the system.
February 12th, 2016, 04:22 PM
#90
Registered User
Join Date: Feb 2013
Location: Tennessee
Posts: 1,393
On '50's -60's Olds sometimes you just have to improvise because original parts are just not available. Congratulations, looks like you have improvised well, and I'm sure for a fraction of the cost otherwise. I vaguely remember working on a 1965 Impala years ago and it had a manifold (similar to the one shown on post 85). Just looking on the Internet and [url]www.thepartsguy.com. Has one listed that fits the '65 Impala with factory AC.You might want to take a look and see if it resembles what you need. Larry
Last edited by Rocketowner; February 15th, 2016 at 06:05 AM. Reason: Add info
February 13th, 2016, 02:14 AM
#91
Frank Ignachuck
Join Date: Jan 2012
Location: Maynard, Massachusetts
Posts: 1,285
Jeff, all that ductwork was missing on mine as well, but RockAuto is a good source for that (watch the shipping costs). Keep us posted on the R134 issue. I will also, if I get there before you.
Rocketowner, Thanks, I'll check out thepartsguy.
Frank
Rocketowner, Thanks, I'll check out thepartsguy.
Frank
March 11th, 2016, 10:20 AM
#92
Registered User
Thread Starter
Join Date: Jun 2013
Location: STLMO
Posts: 124
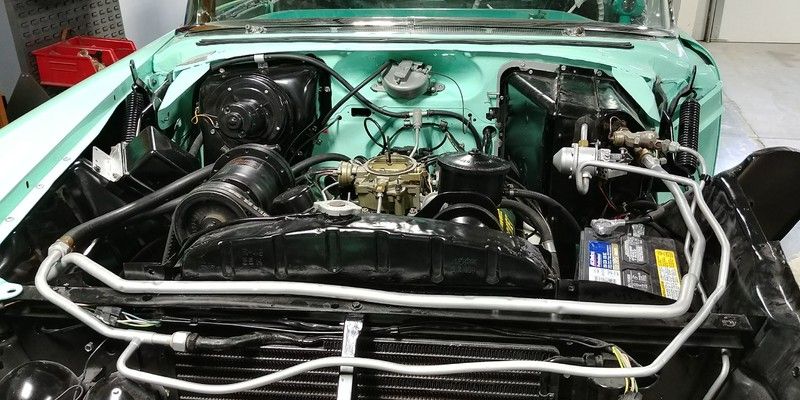
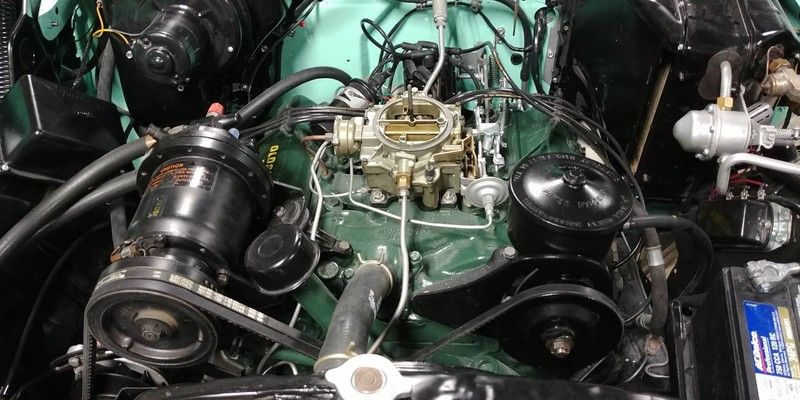
I've been told by a few people that R134 will be fine. I took some pics the other day before putting the rad support back together.
ewe_zpsrdglplac.jpg
sdfsssd_zpsc0zurswy.jpg
d_zpspxmzxzfw.jpg
sdf_zpsmzsgpjb5.jpg
2006%20Day%20of%20caring%202_zpsrp5xuija.jpg
ewe_zpsrdglplac.jpg
sdfsssd_zpsc0zurswy.jpg
d_zpspxmzxzfw.jpg
sdf_zpsmzsgpjb5.jpg
2006%20Day%20of%20caring%202_zpsrp5xuija.jpg
May 4th, 2016, 01:57 PM
#93
Registered User
Join Date: Aug 2014
Location: Imlay City, Mi.
Posts: 19
Hey JackJack, I have a '56 olds with a 303 that I am about to pull the engine out of because my cam is wiped out and so are my lifters. It sucks because the engine had been rebuilt by previous owner. I'm going to tear the engine down and see what else is going on. I am interested in if you were able to use the stock length for your pushrods (if you decked the heads). Also, when you did your break in for the engine, what exactly did you do for the rpm's and how did you pre oil the engine before startup. Your build looks great and I really enjoyed looking at your posts.
May 4th, 2016, 05:32 PM
#94
A '56 should have a 324 cid
Did the PO put the 303 in because of the rebuild?
Gene
Did the PO put the 303 in because of the rebuild?
Gene
Hey JackJack, I have a '56 olds with a 303 that I am about to pull the engine out of because my cam is wiped out and so are my lifters. It sucks because the engine had been rebuilt by previous owner. I'm going to tear the engine down and see what else is going on. I am interested in if you were able to use the stock length for your pushrods (if you decked the heads). Also, when you did your break in for the engine, what exactly did you do for the rpm's and how did you pre oil the engine before startup. Your build looks great and I really enjoyed looking at your posts.
May 6th, 2016, 09:59 AM
#96
Registered User
Thread Starter
Join Date: Jun 2013
Location: STLMO
Posts: 124
Hey JackJack, I have a '56 olds with a 303 that I am about to pull the engine out of because my cam is wiped out and so are my lifters. It sucks because the engine had been rebuilt by previous owner. I'm going to tear the engine down and see what else is going on. I am interested in if you were able to use the stock length for your pushrods (if you decked the heads). Also, when you did your break in for the engine, what exactly did you do for the rpm's and how did you pre oil the engine before startup. Your build looks great and I really enjoyed looking at your posts.
I didn't have the heads decked. I used all stock replacement components accept a hotter cam from CamCraftCams. Same length push rods. I found ebay had some cheaper prices on new parts than some of the big name aftermarket suppliers like Kanter, USA and Fusick. The cam/engine sounds really good. I wanted some lope to it. Its not crazy but fine by me.
As far as pre-oiling I left all the plugs out and cranked the engine until I got oil leaking from different places.
 My oil filter can's copper washer on the bolt was leaking really bad so I knew that was getting full. I never saw oil squirting at the top of the valves and rockers but figured it was good enough given the leaks. I looked into getting a drill on the oil pump through the distributor hole but its not a typical Chevy style pump rod. There was a post on the HAMB I think that showed guys making extensions to fit the Olds pump rod (D shaped). It was too much work to worry about. I don't recall an exact RPM.
I currently have started the car a handful of times and drove it once down the road for about 15 minutes only getting to about 30mph. It wanders and is real squirrelly. Not sure if its a gear problem or alignment. During break in and after a few weeks of periodic starts it was fine no problem. Since then when it gets hot it starts to burn oil. Only when its hot and at all throttle positions. I'm assuming the rings haven't seated since I haven't actually driven it.
Another problem I had was a timing cover seal leaking a few times (found it was the second replacement balancer I received from Fusick. Very pitted. So I sleeved it and it finally subsided. Then a t-stat housing leak.
More importantly though the accel pump wasn't squirting in one side and then after some tuning the metering screw wouldn't changing anything. The carb came off and it showed to be very dirty. it was rebuilt 2 years ago just before engine teardown. I knew the fuel filter I put on the rail in the line from the tank was dirty but didn't realize it was that bad in the carb. I still have a filter in the glass bowl on the pump too.
I took the tank down and found the sender float was sticking (my gauge problem I'm sure) and the tank was nasty. I took to a local rad shop who does all kinds of services. He said since it was coated once (receipt shows 2001) that it can't be recoated again and its junk. I have a new fuel tank, sender, cap on order.
The balancer showing the pits. That score mark was only half way around and the seal wasn't even close to it.
Balancer%2056%20Olds_zpswpzocflk.jpg
Inside the fuel tank
Junk%20fuel%20tank%2056%20oldsmobile_zps87frco1s.jpg
Last edited by JackJack56Olds; May 6th, 2016 at 10:04 AM.
May 7th, 2016, 05:16 AM
#97
Registered User
Join Date: Aug 2014
Location: Imlay City, Mi.
Posts: 19
Thanks for all the info. Before my engine went down on me I had my king pins replaced and an alignment. That helped out quite a bit, and I also changed out my front sway links as they were shot. Those two things made a world of difference. Something to look into. I also had my carb rebuilt at Abel automotive in Baltimore, Maryland. They did a fantastic job. It looked so good when I got it back that it was almost a shame to use it! Happy cruising.
May 10th, 2016, 05:48 AM
#98
Registered User
Thread Starter
Join Date: Jun 2013
Location: STLMO
Posts: 124
I def need an alignment since the upper control arms were off and I replaced the bushings and threaded shaft through that.
Here are some pics of the carb and fuel that was in it. The carb was rebuilt right before engine teardown. I had a clear fuel filter right after the tank in the line and one in the sediment bowl. I don't know how this stuff got inside the carb but it did.
bad%20fuel_zpswijlfvk9.jpg
bad%20fuel%202_zpssvjn9ffk.jpg
May 10th, 2016, 05:16 PM
#99
Registered User
Join Date: Aug 2014
Location: Imlay City, Mi.
Posts: 19
Yikes! Hopefully none of that got into your engine. Definitely a carb rebuild is in order it looks like. I am going to be pulling my engine this Friday with a little help from some friends. Then the real fun begins.
June 6th, 2016, 09:36 AM
#103
Registered User
Thread Starter
Join Date: Jun 2013
Location: STLMO
Posts: 124
I haven't done much with the car lately. The wife and I had a baby about 3 weeks ago so my attention has been diverted. 2 weekends ago I put in the brand new fuel tank from Fusick. Perfect fit for the car. I'm just happy I won't have to worry again about the crud in the tank. I did get the carb back on after it was clogged with debris. The accel pump was working fine off the car when filled with WD40. I put it on the car, started it, and found it wasn't squirting fuel again. Then I found the t-stat housing gasket leaking. I replaced the gasket this past weekend with this one from O'Reillys. It had an adhesive on the one side of it. I've never seen it before. It was like a sticker. You pull off the backing and it stuck right to the housing. Then it was dry on the other side. So I put a little sealer on the dry side and put it on. Over the weekend I pulled the car out to the driveway and let it run for a while to try to get the carb working properly and see if the leak was gone. The carb started squirting again but it still wants to fall on it's face if I hit the accelerator hard like its getting too much air. Then of course the t-stat gask is leaking just barely. It appears to be from the side that had the adhesive on it. I'm sure its leaking because the housing wasn't completely smooth. Maybe someday I'll be able to drive it.
September 27th, 2016, 02:45 PM
#106
Registered User

Join Date: Sep 2016
Location: Regensburg, Bavaria, Germany
Posts: 22
Hello there,
I`m the proud owner of a `56 Super 88 Holiady and need your help with the heater tubes. Can you tell me how to connect them the right way ? The heating has been disconnected when I bought the car. There are two connections on the left and two on the right side of the heater core. Which one goes where to ?? I really appreciate any help guys.
Thanks much, a bavarian Rocket 88 pilot ;-)
 September 29th, 2016, 11:25 AM
#108
Registered User
Thread Starter
Join Date: Jun 2013
Location: STLMO
Posts: 124
Hello there,
I`m the proud owner of a `56 Super 88 Holiady and need your help with the heater tubes. Can you tell me how to connect them the right way ? The heating has been disconnected when I bought the car. There are two connections on the left and two on the right side of the heater core. Which one goes where to ?? I really appreciate any help guys.
Thanks much, a bavarian Rocket 88 pilot ;-)
I`m the proud owner of a `56 Super 88 Holiady and need your help with the heater tubes. Can you tell me how to connect them the right way ? The heating has been disconnected when I bought the car. There are two connections on the left and two on the right side of the heater core. Which one goes where to ?? I really appreciate any help guys.
Thanks much, a bavarian Rocket 88 pilot ;-)
I think you will get what you need from the pics below. The bottom hose on the left of the box crosses under the box into the front of the valve. The left side of the valve goes to the block. The upper hose from the left side of the box travels to the front cover.
<a href="http://s54.photobucket.com/user/chvscks319/media/Mobile%20Uploads/20160127_191336_zpssvptqwci.jpg.html" target="_blank">20160127_191336_zpssvptqwci.jpgOldsmobile%2056%20heater%20hose_zpsa5bdqymb.jpg
September 29th, 2016, 11:41 AM
#109
Registered User
Thread Starter
Join Date: Jun 2013
Location: STLMO
Posts: 124
So I've been wanting to go for a test drive but the first time out it was a little squirrelly. Instead of getting an alignment right off the bat I wanted to put new springs in to help with the stance. I had a noticeable lean to the passenger side so I replaced the front springs knowing the passenger side had helpers in it. Replacing the front springs with a 2" built in drop didn't help. So I bought all new leaf springs with a 2" drop, the shackles, bolts, bushings, etc from springsnthings. That didn't help the lean. So what I found out is the front passenger side wheel had to have hit something really hard. Slowly the signs revealed themselves. The powdercoater told me he welded a crack on the upper arm when he coated it. At the time I said thank you and moved on. As I did the lower springs I found the pivot shaft was bent. then I found elongated pivot shaft holes in the frame. Then the frame looked tweaked. And so on and so forth. Now I need to get it to a frame shop to help me out it looks like. Just when you think it's going to be easy. Also, in the process my fuel pump started leaking on me so I had to fix that. I replaced tie rods and other steering rubber parts. I thought I had a radiator leak so the radiator came back out and was tested. The tests came back fine so I guess it was a hose clamp spritzing in a weird spot. Someday it will be fixed.
On the ground with lean
Olds%20rear_zpsyxeeqj7s.jpg
On jack stands sitting on the frame rails which was level
Olds%20tail_zpspljaff1v.jpg
Upper arm with welded crack and a knuckle that wasn't lining up.
Oldsmobile%201956%20Control%20Arm_zpsanh2zaql.jpg
A bent pivot shaft on the lower arm
Oldsmobile%20pivot%20shaft%20bent_zps77scfesu.jpg
Mangled bolt hole and subframe
Olds%20frame%20control%20arm_zpsqshk88pp.jpg
The difference is roughly a half to 3/4" difference.
Olds%20frame_zpsfcnogulc.jpg
Last edited by JackJack56Olds; September 29th, 2016 at 11:46 AM.
September 30th, 2016, 03:56 PM
#110
Car Nerd
Join Date: Jul 2013
Location: Grapevine, TX
Posts: 174
Jack, keep plugging along and you'll be driving it in no time.
I have decided to channel my inner 14 year old and comment on one of your posts from last year with the picture of the "Pleasurizer" shock...
Tee hee. That is all.
I have decided to channel my inner 14 year old and comment on one of your posts from last year with the picture of the "Pleasurizer" shock...
Tee hee. That is all.
December 19th, 2016, 02:32 PM
#112
Registered User
Thread Starter
Join Date: Jun 2013
Location: STLMO
Posts: 124
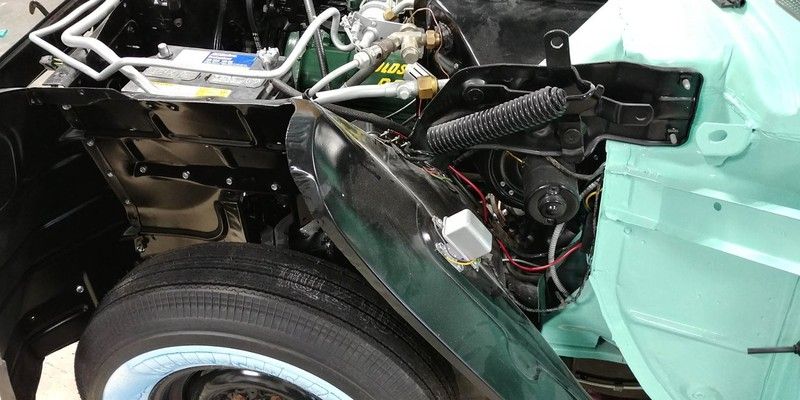
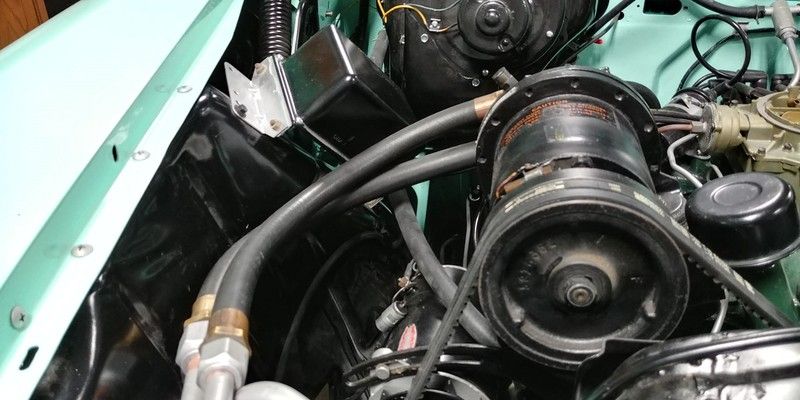
I'll have to double check but I don't believe there is one on the generator. I think you might be seeing the one that goes from the AC Compressor to the lower half of the AC Comp bracket. It's a two piece bracket separated by thick rubber insulators therefore the ground strap. If I get a chance soon I will see if I can snap some more pics.
December 19th, 2016, 03:05 PM
#113
Frank Ignachuck
Join Date: Jan 2012
Location: Maynard, Massachusetts
Posts: 1,285
I'll have to double check but I don't believe there is one on the generator. I think you might be seeing the one that goes from the AC Compressor to the lower half of the AC Comp bracket. It's a two piece bracket separated by thick rubber insulators therefore the ground strap. If I get a chance soon I will see if I can snap some more pics.
 December 21st, 2016, 06:36 AM
#115
Registered User
Thread Starter
Join Date: Jun 2013
Location: STLMO
Posts: 124
groundstrap_zps85ltkowq.jpg
groundstrap%20Oldsmobile%201956_zpshozhd7si.jpg
ground%20strap%2056%20Olds_zpsp7gcjdk9.jpg
September 28th, 2018, 09:57 AM
#116
Registered User
Thread Starter
Join Date: Jun 2013
Location: STLMO
Posts: 124
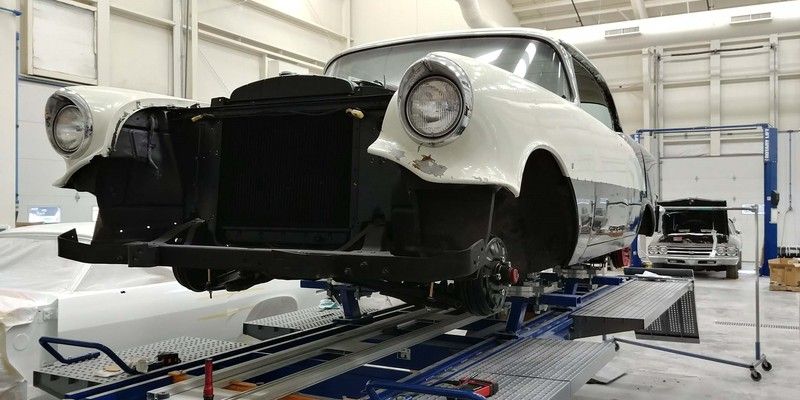
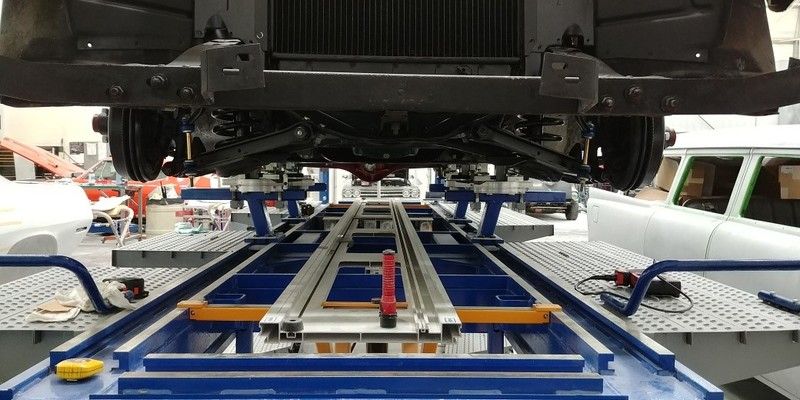
So it's been almost two years and I feel it's time to keep telling the story and documenting pics for others who may need them on their projects.
I stumbled across a local resto shop, Frisco Hill Auto, who specializes in Pontiac and Olds restorations. They had a frame rack to use which helped me and my project. Sadly they found the frame was straight but happily they found the frame was straight. They think the lean I was experiencing might be more in the body. I'm just going to drive it at this point. They aligned it and it rode fine. I had them align all the panels and body gaps since it was never done with the repaint in the 90's.
Here are a few pics.


 September 28th, 2018, 10:06 AM
#118
Registered User
Thread Starter
Join Date: Jun 2013
Location: STLMO
Posts: 124
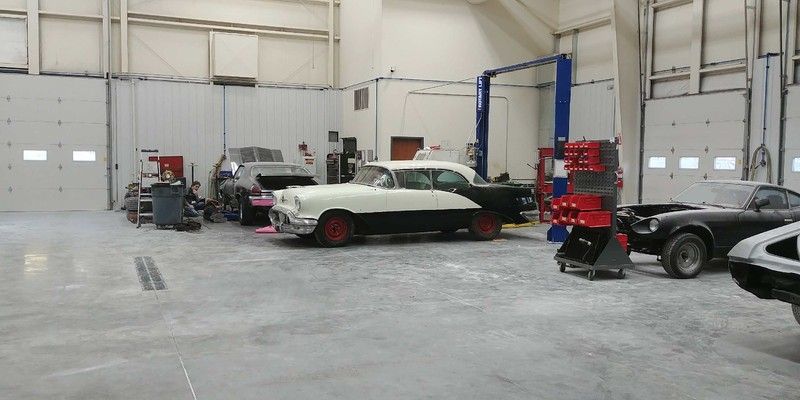
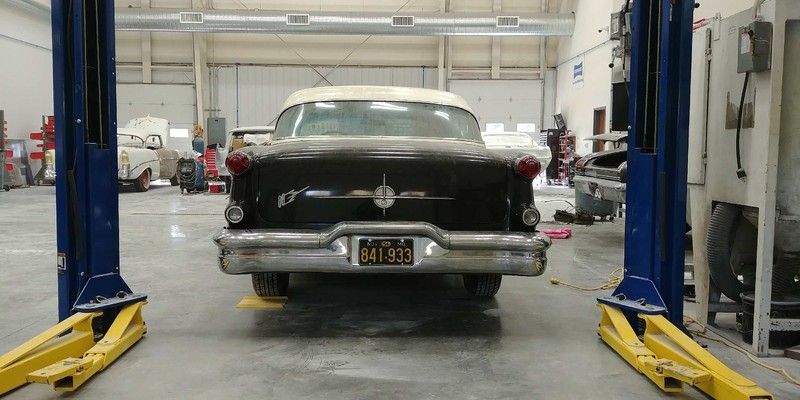
Ironically they had another 56 in there getting a frame up resto done with AC! It was a 98 model that required a parts car to save it.


Last edited by JackJack56Olds; September 28th, 2018 at 10:08 AM. Reason: Added more pics
October 2nd, 2018, 11:06 AM
#120
Registered User
Thread Starter
Join Date: Jun 2013
Location: STLMO
Posts: 124
Thanks! Yeah, a lot has happened in two years! Amazing what life brings you.
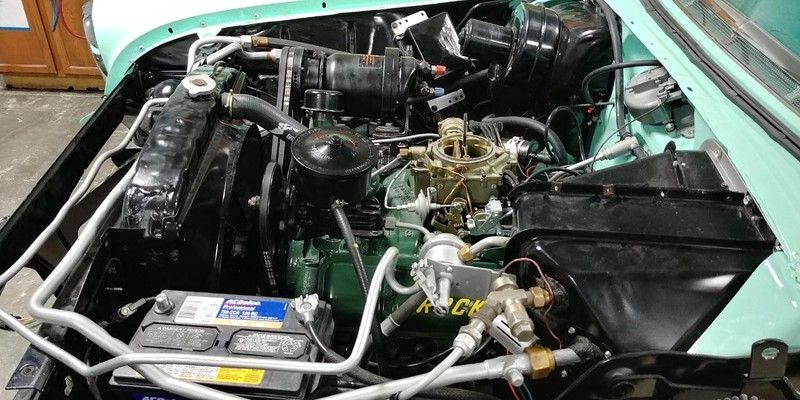
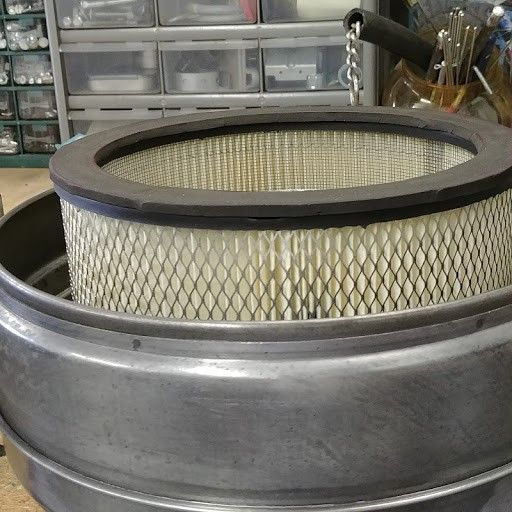
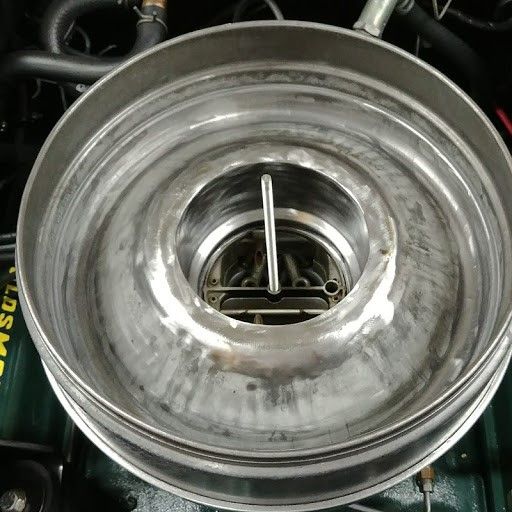
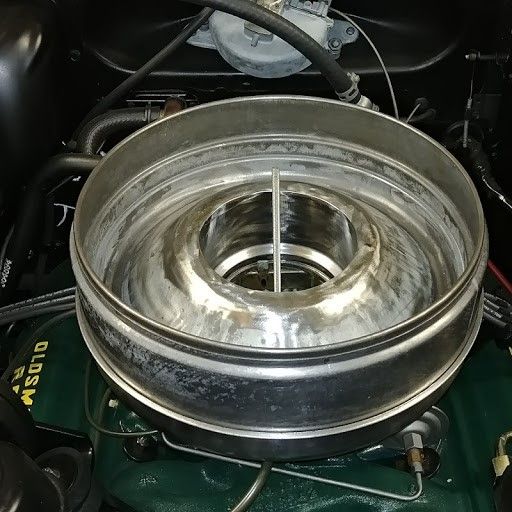
I was originally going to go with a reproduction air cleaner I bought off ebay. I found that I would need an offset base to make it fit without hitting the firewall. No big deal but then when I wanted to go with the original carb the original carb had a smaller base circle than newer carbs so an adapter was necessary. After not finding any easy solutions I bought an extra Olds/Caddy air cleaner oil bath style. My intent was to convert it to a paper filter inside. My original air cleaner wasn't a three piece design but this vintage one off ebay was. Not entirely sure about the differences.
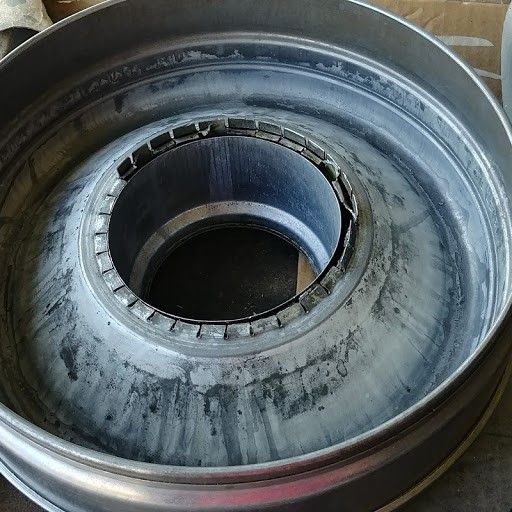
There were some rust holes in the bottom of the base I needed to fix and I sealed it off on the inside to help with flow and not sucking in air from places it shouldn't be coming from. I had to make up some clearance so I had some foam laying around from McMaster Carr and cut it to put on top of the filter giving me a nice seal.

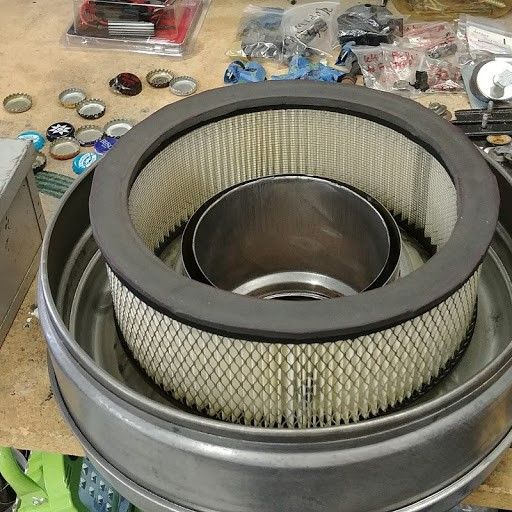
I was originally going to go with a reproduction air cleaner I bought off ebay. I found that I would need an offset base to make it fit without hitting the firewall. No big deal but then when I wanted to go with the original carb the original carb had a smaller base circle than newer carbs so an adapter was necessary. After not finding any easy solutions I bought an extra Olds/Caddy air cleaner oil bath style. My intent was to convert it to a paper filter inside. My original air cleaner wasn't a three piece design but this vintage one off ebay was. Not entirely sure about the differences.
There were some rust holes in the bottom of the base I needed to fix and I sealed it off on the inside to help with flow and not sucking in air from places it shouldn't be coming from. I had to make up some clearance so I had some foam laying around from McMaster Carr and cut it to put on top of the filter giving me a nice seal.


